
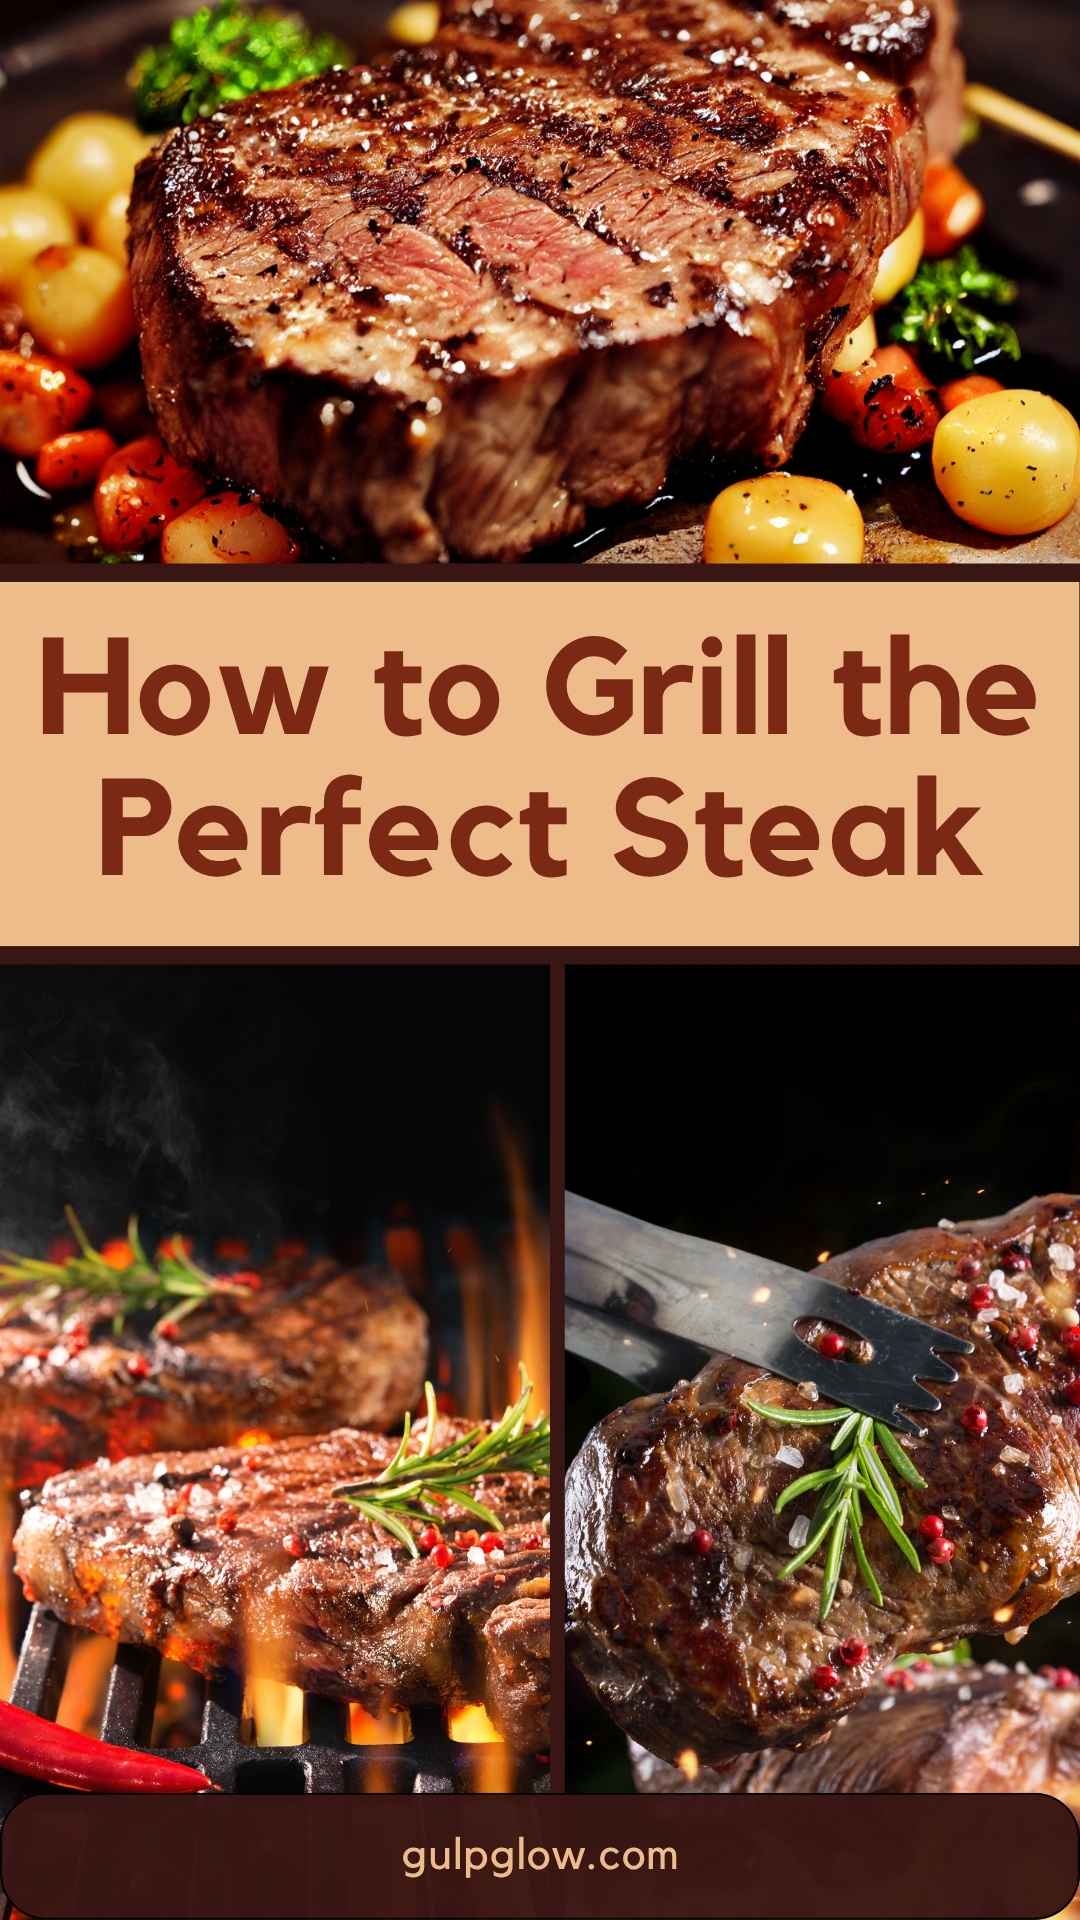
How to Grill the Perfect Steak: Times, Temperatures & Tips
There’s nothing quite like the sizzle of a steak hitting a hot grill—a sensory experience that combines mouthwatering aromas, the crackle of flames, and the promise of a perfectly charred crust encasing a juicy, tender center. Whether you’re a weekend grill warrior or just looking to impress at your next backyard barbecue, mastering steak on the grill is both an art and a science.
Yet, getting that steak just right—crispy on the outside, your ideal shade of pink on the inside—often feels more elusive than it should. Questions about cuts, grill temperature, cooking times, and doneness levels can quickly turn excitement into anxiety, and no one wants to serve a steak that misses the mark.
If you’ve ever wondered how top chefs consistently achieve steak perfection, you’re in the right place. This guide breaks down everything you need to know: from choosing your cut and prepping your grill, to dialing in times, temperatures, and those finishing touches that make all the difference. Let’s fire up the grill and unlock the secrets to steakhouse-quality results at home.
Read Also: 10 Recipes To Grill This Summer
Choosing & Preparing Your Steak
Grilling the perfect steak starts well before you light the grill. Selecting the right cut and prepping it properly can make or break your results, so let’s start at the butcher counter.
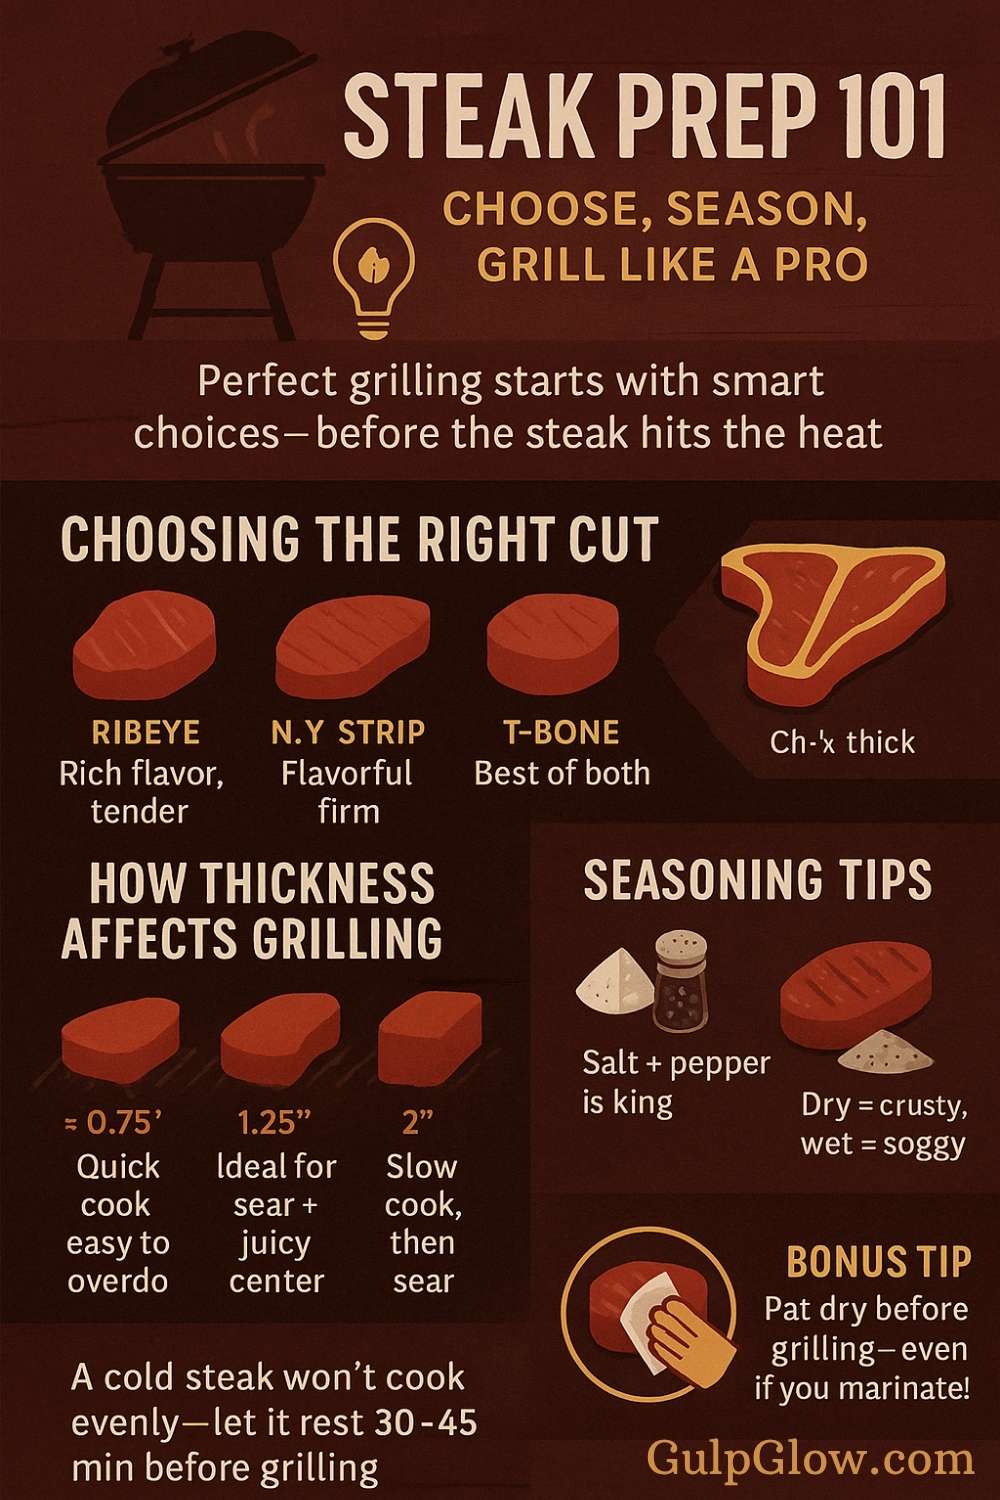
Selecting the Right Cut
Not all steaks are created equal. The cut you choose will directly affect the flavor, tenderness, and juiciness of your grilled masterpiece. Some popular choices include:
- Ribeye: Known for its rich marbling and robust flavor. Ribeyes are forgiving on the grill due to their fat content.
- New York Strip: A favorite for those who like a balance of flavor and tenderness, with a satisfying chew.
- Filet Mignon: The most tender cut, but with a milder flavor. Often thicker, making it easier to achieve a perfect rare or medium-rare center.
- T-Bone/Porterhouse: These deliver two experiences in one—a strip steak on one side and a tenderloin on the other.
Look for good marbling (white streaks of fat within the meat), which helps keep the steak juicy and flavorful as it cooks.
Thickness Matters
Thickness is just as important as the cut. For grilling, steaks between 1 and 1.5 inches thick are ideal. Thinner steaks cook quickly and can overcook in the blink of an eye, while extra-thick cuts (2 inches or more) are best tackled with advanced methods like the reverse-sear.
Quick Tip:
If you’re after dramatic grill marks and a perfectly cooked center, opt for steaks at least 1.25 inches thick.
Bringing Steak to Room Temperature
A cold steak straight from the fridge won’t cook evenly. Remove your steak from the refrigerator about 30–45 minutes before grilling. Allowing it to come to room temperature ensures a uniform cook from edge to center.
Seasoning: Simplicity is Key
When it comes to seasoning, less is often more. Generously sprinkle both sides with coarse salt and freshly ground black pepper just before grilling. This classic approach draws out the meat’s natural flavors and creates a delicious crust.
- For extra flavor, you can add garlic powder, smoked paprika, or a sprinkle of your favorite steak rub.
- If marinating, do so for at least 30 minutes and up to 24 hours, but always pat the steak dry before grilling to encourage browning.
Grill Setup & Heat Zones
A successful steak isn’t just about the meat—it’s also about managing your grill like a pro. Setting up proper heat zones gives you control and flexibility, ensuring a flavorful sear without burning or undercooking.
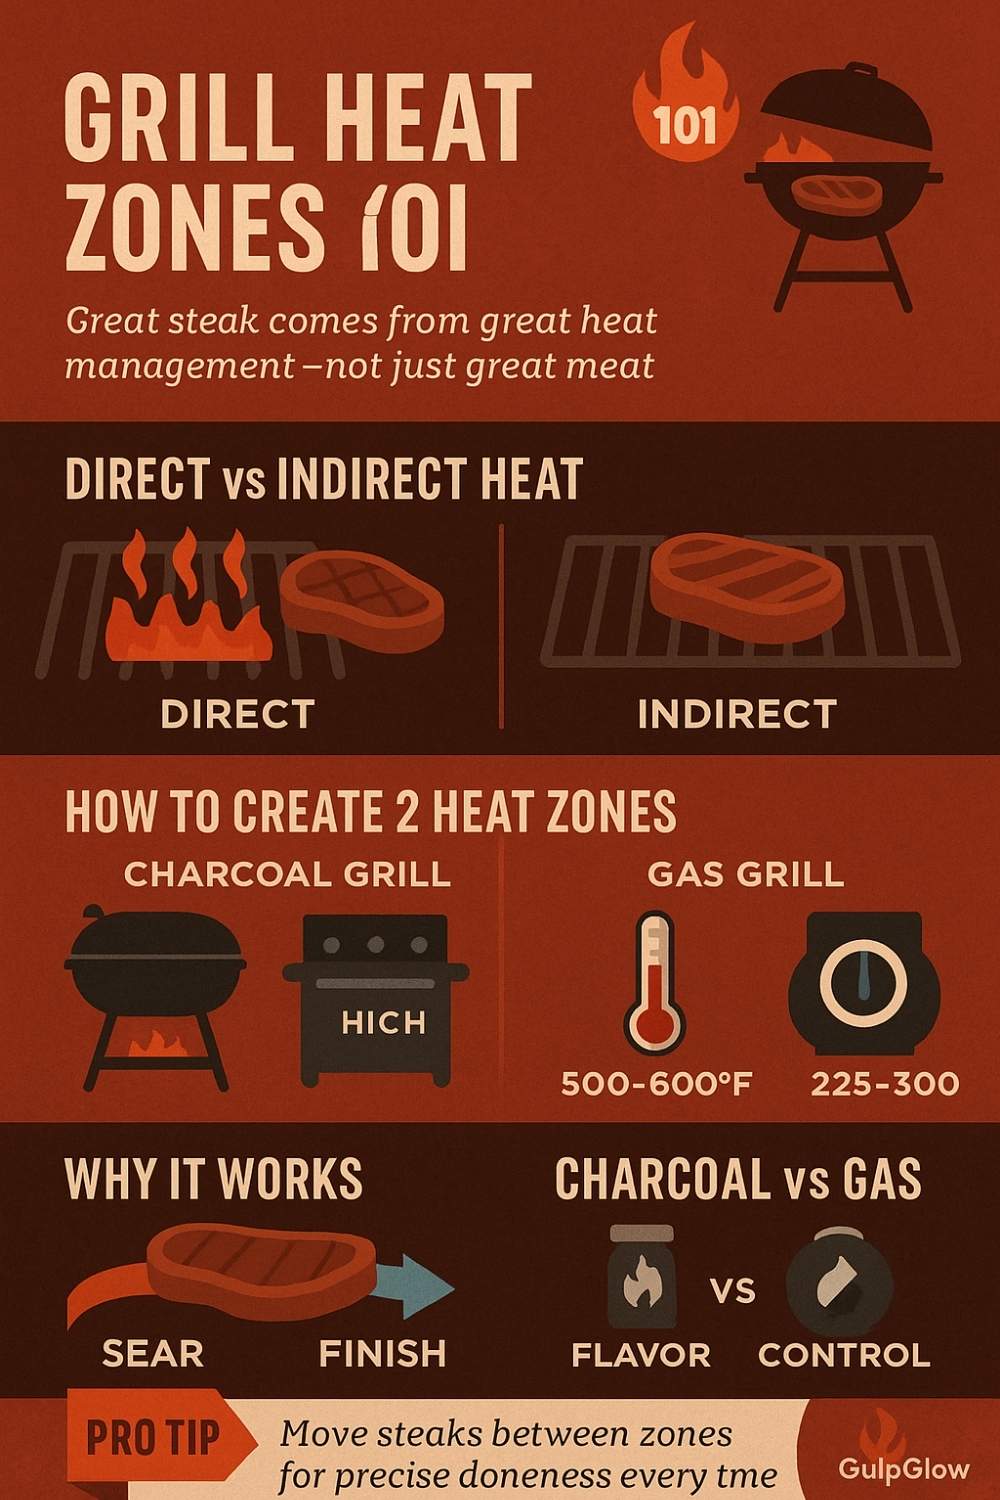
Understanding Direct vs Indirect Heat
- Direct Heat: This is when steaks are placed directly over the flames or heat source. It’s perfect for searing and developing that coveted crust.
- Indirect Heat: Here, the steak sits away from the direct flames, allowing it to cook more gently and evenly. This method is key for thicker steaks or finishing after a quick sear.
Creating Two-Zone Cooking on Your Grill
Setting up your grill with two heat zones gives you options:
- Charcoal Grills: Bank hot coals to one side for a sear zone and leave the other side coal-free for gentle finishing.
- Gas Grills: Turn one burner on high and leave the others on low or off entirely. This replicates direct and indirect zones.
Pro Tip:
A two-zone setup lets you move steaks between high and low heat as needed—searing first, then finishing slowly to your preferred doneness.
Suggested Grill Temperatures
- For Searing: Aim for 500–600 °F on the hot side of your grill. This high temperature is crucial for creating a caramelized crust.
- For Finishing: The cooler side should register around 225–300 °F, allowing the steak’s internal temperature to rise slowly without overcooking the exterior.
Charcoal vs Gas: Which is Best?
Both methods deliver excellent results. Charcoal grills add smoky flavor and get extremely hot, while gas grills offer convenience and easy temperature control. Whichever you choose, focus on mastering heat zones for best results.
Searing & Cooking Times
With the steak prepped and your grill ready, it’s time for the main event. How you sear and time your steak will determine its final flavor, texture, and juiciness.
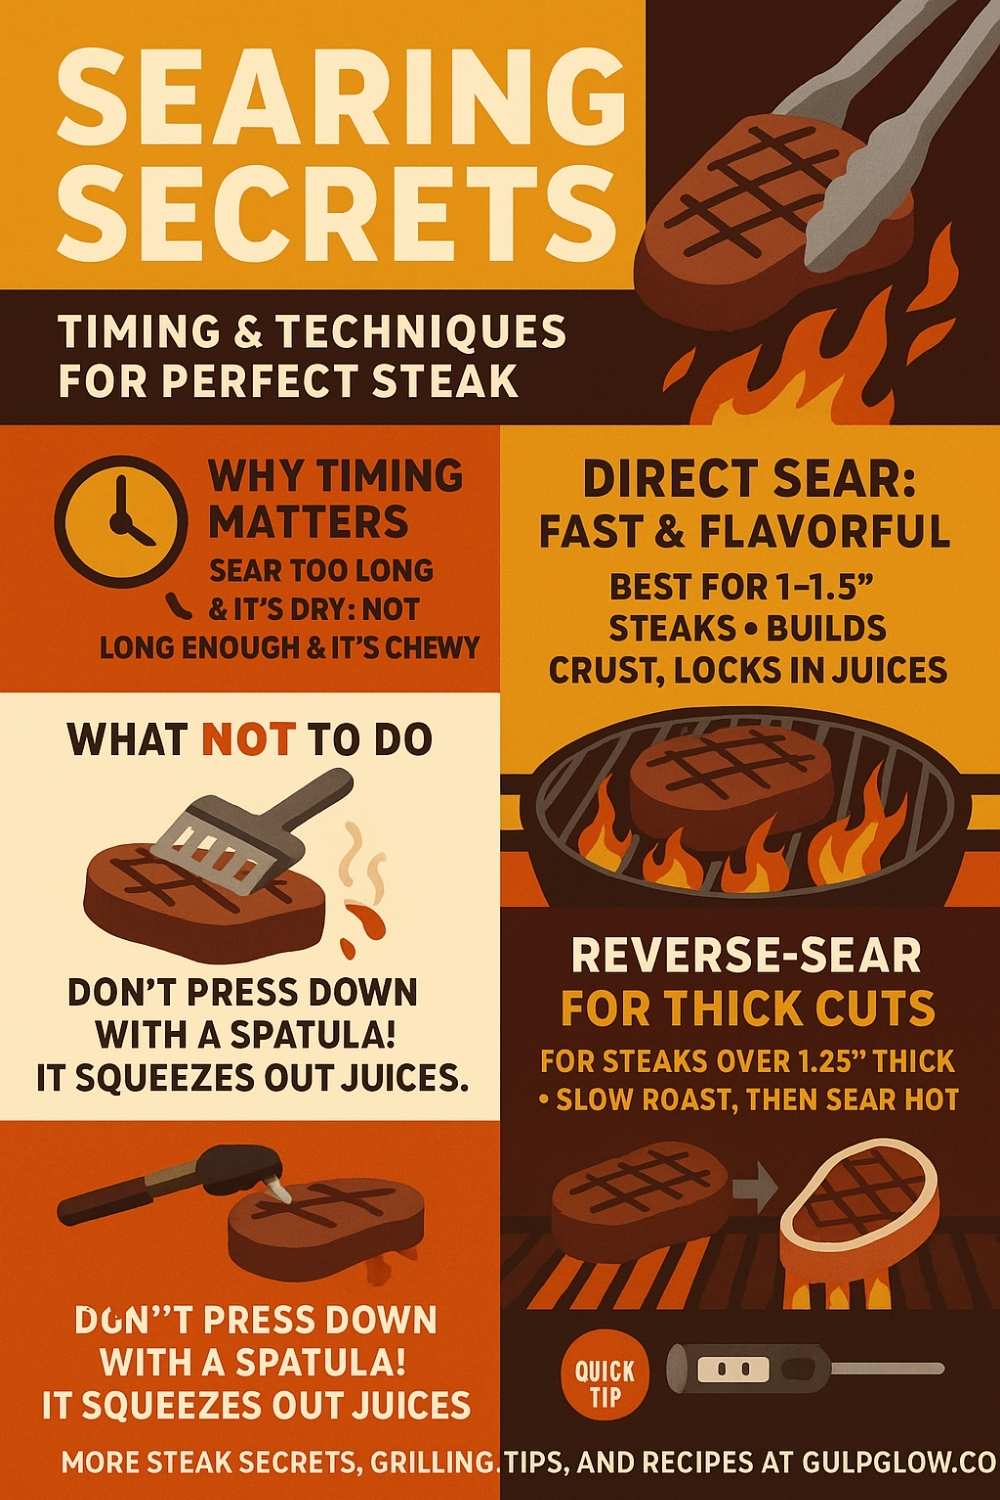
Traditional Direct Sear Method
For most home grillers, the direct sear is the go-to. Place your steak over the hottest part of the grill:
- 1-inch steak: Sear for about 3–5 minutes per side, depending on desired doneness.
- 1.5-inch steak: Go for 4–6 minutes per side, checking for grill marks before flipping.
Avoid pressing down with a spatula, as this squeezes out flavorful juices.
Reverse-Sear Method for Thick Steaks
If you have a steak thicker than 1.25 inches, consider the reverse-sear technique:
- Start by cooking the steak over indirect (low) heat until it’s about 10–15°F below your target doneness.
- Move the steak to the hottest part of the grill and sear each side for 1–2 minutes to develop a flavorful crust.
Why use reverse-sear?
It gives you more control over doneness, reduces the risk of burning the outside, and ensures a perfect pink center from edge to edge.
Example Cooking Times by Thickness and Doneness
Here’s a handy table for reference (all times per side):
| Thickness | Rare (120–125 °F) | Medium-Rare (130–135 °F) | Medium (135–145 °F) | Well Done (155+ °F) |
|---|---|---|---|---|
| 1 inch | 3–4 min | 4–5 min | 5–6 min | 6–7 min |
| 1.5 inches | 4–5 min | 5–6 min | 6–7 min | 8–9 min |
| 2 inches* | 5–6 min | 6–7 min | 7–8 min | 9–10 min |
*For steaks 2 inches or thicker, use the reverse-sear method for best results.
Note:
Cooking times vary based on grill temperature and steak starting temperature. Always use a meat thermometer for best accuracy.
Temperature Targets & Doneness Guide
Grilling a steak to perfection hinges on more than just time; it’s all about hitting the right internal temperature. This is where the difference between a tender, juicy steak and one that’s tough or dry really becomes obvious. Understanding the nuances of steak doneness—and how to check it—is the key to confidence at the grill.

Before you start, remember that steaks will continue to cook for a few minutes after coming off the grill due to residual heat (this is called “carryover cooking”). To account for this, you should remove your steak when it’s about 5°F below your target temperature.
Internal Temperature Ranges
Every steak lover has their own preference, but here are the classic temperature guidelines:
- Rare: 120–130 °F (bright red center, very juicy)
- Medium-rare: 130–135 °F (warm red center, juicy and tender)
- Medium: 135–145 °F (pink center, slightly firm)
- Medium-well: 145–155 °F (small sliver of pink, firmer texture)
- Well done: 155–165 °F (no pink, firm and drier)
The USDA recommends a minimum internal temperature of 145 °F for safety, but many steak aficionados prefer the juiciness and texture of lower doneness levels.
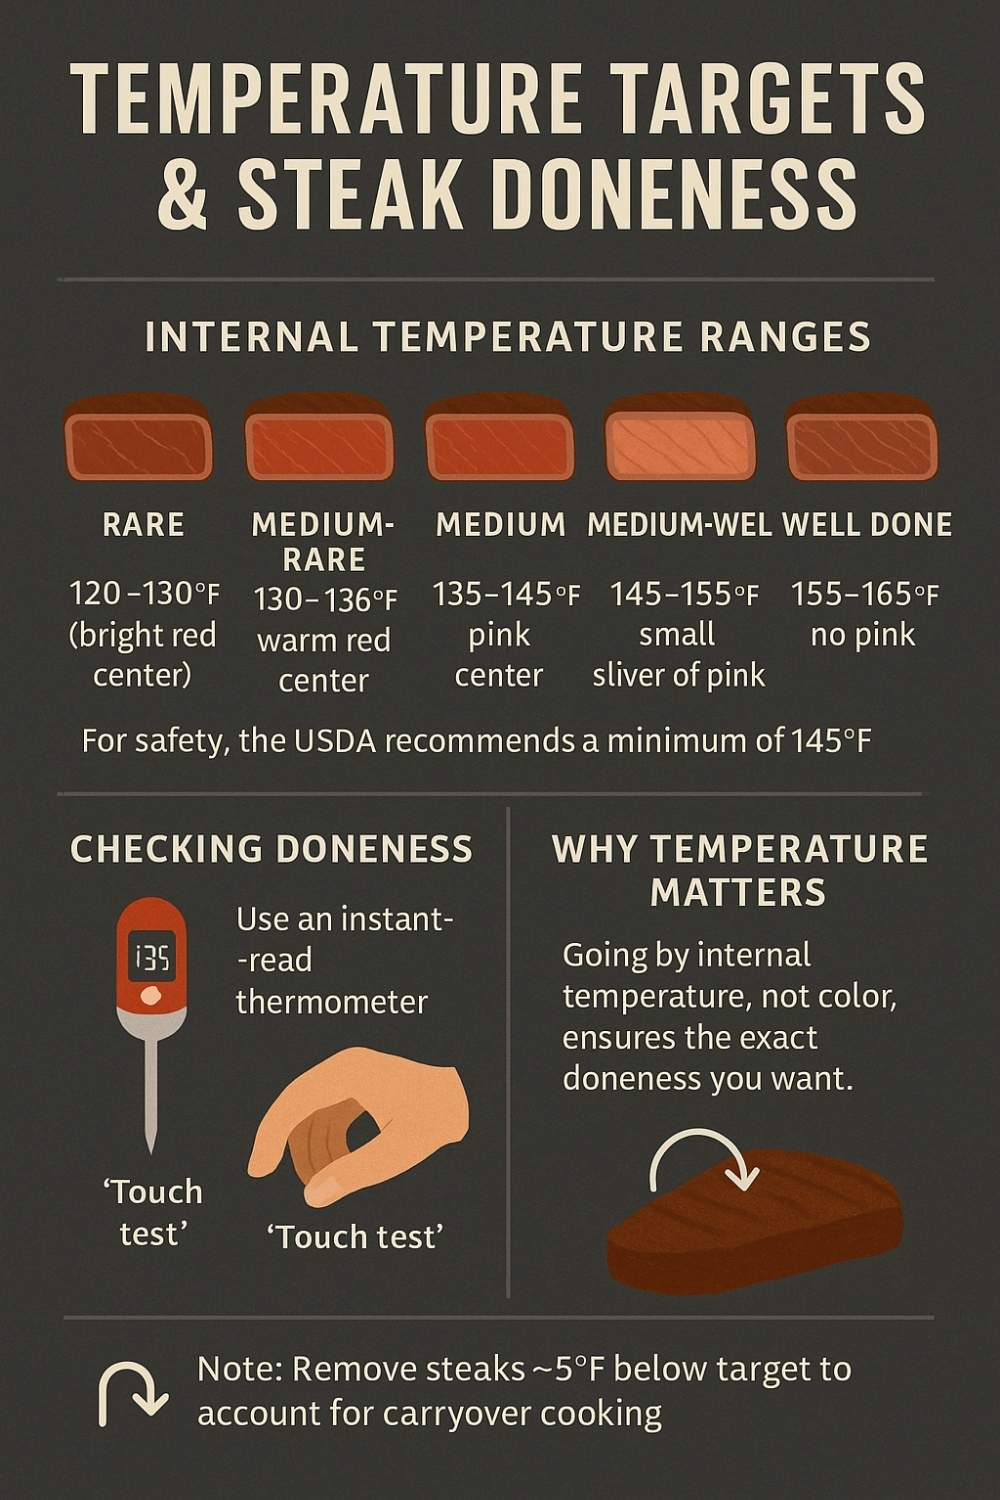
Checking Doneness: Tools and Techniques
The most reliable way to check doneness is with an instant-read digital thermometer. Insert it into the thickest part of the steak, avoiding bones or fat, for the most accurate reading.
If you don’t have a thermometer, you can try the “touch test”:
- Rare steak feels soft, like the fleshy area at the base of your thumb when your hand is relaxed.
- Medium steak has a bit more resistance, like when you touch your thumb to your middle finger.
- Well done feels firm, almost no give.
While this method takes practice, it’s a handy backup when grilling outdoors.
Why Temperature Matters
Relying on color alone can be misleading—lighting, cut thickness, and steak variety all play a part. By focusing on internal temperature, you remove the guesswork, ensuring every bite is exactly as you want.
Resting & Finishing Touches
It’s tempting to dig in as soon as your steak leaves the grill, but patience pays off. Resting is a crucial step that separates good steak from great steak.
The Science of Resting
When steak cooks, its juices move toward the surface. Slicing too soon lets those flavorful juices escape onto your plate, leaving the meat drier than it should be. Letting your steak rest—even for just 5 minutes—gives the juices time to redistribute throughout the meat, ensuring a moist, tender bite every time.

As a general rule, rest your steak for about half the time it spent cooking. For example, if your steak was on the grill for 8 minutes, let it rest for at least 4 minutes.
Adding the Final Touches
While your steak rests, you have the perfect window to add a finishing flourish. A pat of compound butter—mixed with herbs, garlic, or blue cheese—melts beautifully over the hot surface, adding richness and aroma. You might also sprinkle on a bit of flaky sea salt, a squeeze of lemon, or freshly cracked black pepper.
Don’t forget to slice against the grain for maximum tenderness. Serve immediately after resting for best results.
Advanced Tips & Troubleshooting
Even seasoned grillers face challenges from time to time. Knowing how to adapt on the fly and handle unexpected flare-ups can help you maintain control and achieve steak perfection.
Grill Marks and Presentation
Those classic crosshatch grill marks aren’t just for looks—they’re a sign of proper searing. For diamond patterns, start by placing your steak at a 45-degree angle to the grill grates. After 2 minutes, rotate the steak another 45 degrees and continue searing. Flip and repeat for the other side.
Managing Flare-Ups
Fat dripping onto hot coals or burners can cause sudden flames that scorch your steak. If this happens, move the steak to a cooler part of the grill until the flames subside. Keeping the lid closed as much as possible helps control oxygen and reduce flare-ups.
Adjusting for Steak Thickness
Extra-thick cuts benefit from the reverse-sear method, while thinner steaks should stay mostly over direct heat. If you find the outside is browning too quickly while the inside remains raw, shift to the indirect zone and finish cooking gently.
Health and Safety Tips
To reduce the formation of potentially harmful compounds, avoid charring your steak excessively. Using a marinade not only adds flavor but can also help limit these compounds. Always use separate utensils and plates for raw and cooked meat to prevent cross-contamination.
Conclusion: Bringing It All Together
Grilling the perfect steak is an experience that combines anticipation, skill, and a bit of personal flair. With the right cut of meat, careful preparation, and an understanding of grill zones and timing, anyone can elevate their backyard barbecue to steakhouse quality.
Remember, it’s not just about searing the surface—great steak is about respecting the details. From selecting well-marbled cuts and bringing them to room temperature, to mastering grill setup and checking internal temperatures, each step plays an essential role in the final result. Don’t forget the importance of resting your steak, and let those finishing touches—like compound butter or a dash of sea salt—make the meal truly memorable.
Above all, grilling is meant to be enjoyed. Don’t stress about achieving perfection on your first try. Every steak you grill is an opportunity to refine your technique and develop your own signature style. With practice, patience, and a little attention to the science behind great steak, you’ll soon be the grill master your friends and family can’t wait to gather around.
So fire up the grill, trust your senses, and enjoy the process. Your perfect steak is just a few steps away—one sizzle at a time.