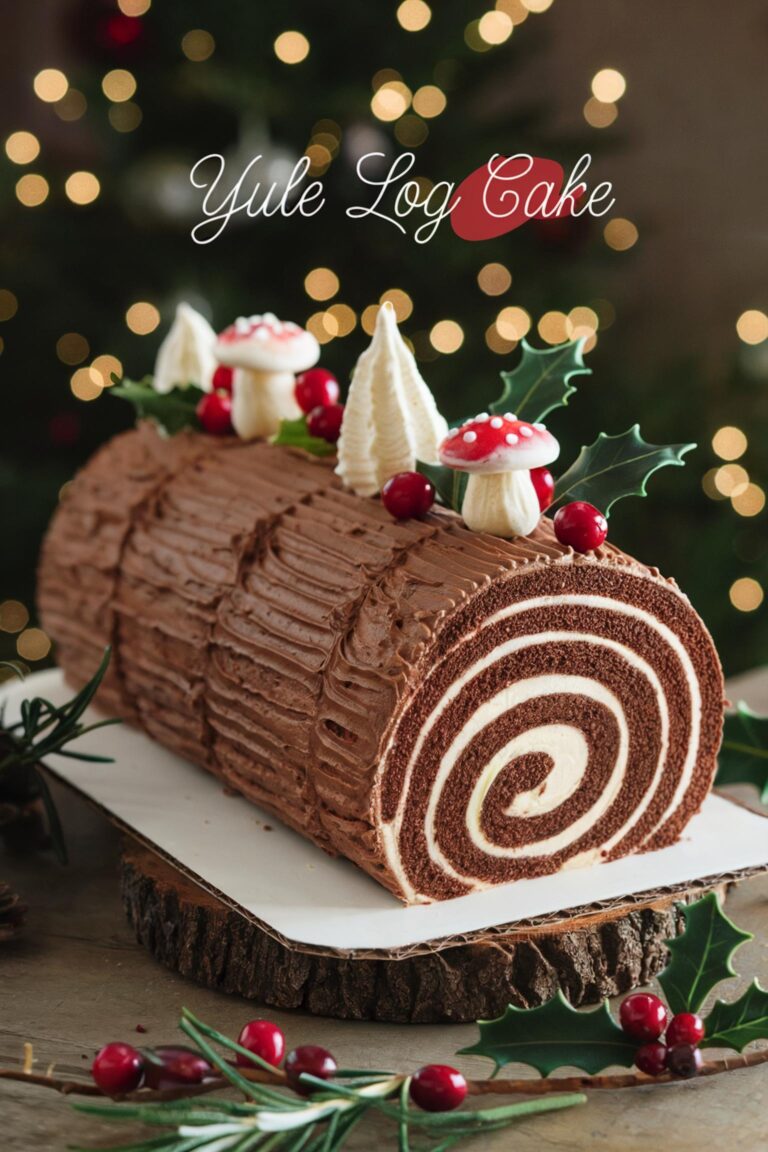
Christmas Red Velvet Cheesecake: A Festive Showstopper
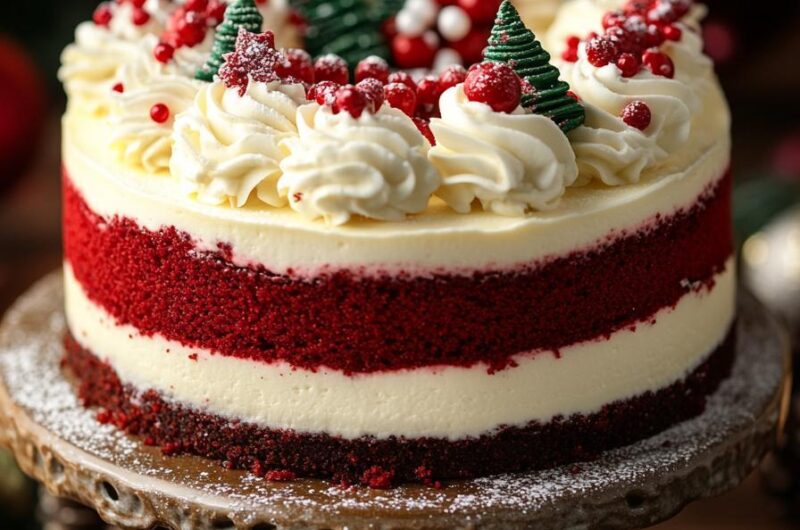
When it comes to holiday desserts, few can rival the elegance and decadence of a Christmas Red Velvet Cheesecake. This layered masterpiece combines the rich, velvety flavor of classic red velvet cake with the creamy smoothness of cheesecake. Its vibrant red hue and snowy white cheesecake layers make it a perfect centerpiece for your Christmas celebrations.

Red velvet cake has long been a symbol of luxury, and pairing it with cheesecake creates a dessert that’s as indulgent as it is beautiful. With its striking color contrast, festive flair, and unforgettable taste, this cheesecake is sure to impress your family and friends. Whether you’re hosting a party or simply indulging in holiday baking, this recipe will be a standout addition to your festive repertoire.
Ingredients
Red Velvet Cake Layers
| Ingredient | Quantity |
|---|---|
| All-purpose flour | 2 1/2 cups |
| Unsweetened cocoa powder | 2 tbsp |
| Baking powder | 1 tsp |
| Baking soda | 1 tsp |
| Salt | 1/2 tsp |
| Granulated sugar | 1 3/4 cups |
| Vegetable oil | 3/4 cup |
| Buttermilk (room temperature) | 1 cup |
| Eggs | 2 large |
| Red food coloring (gel or liquid) | 1–2 tbsp |
| Vanilla extract | 1 tsp |
| White vinegar | 1 tsp |
Cheesecake Layer
| Ingredient | Quantity |
|---|---|
| Cream cheese (softened) | 16 oz (2 blocks) |
| Granulated sugar | 1/2 cup |
| Sour cream | 1/2 cup |
| Eggs | 2 large |
| Vanilla extract | 1 tsp |
Cream Cheese Frosting
| Ingredient | Quantity |
|---|---|
| Cream cheese (softened) | 8 oz |
| Unsalted butter (softened) | 1/2 cup |
| Powdered sugar | 3 cups |
| Vanilla extract | 1 tsp |
Use gel food coloring for a vibrant red hue without altering the cake’s texture. High-quality cocoa powder enhances the chocolatey undertones of the red velvet layers.
Equipment Needed
You’ll need:
- 9-inch springform pan for the cheesecake layer.
- Round cake pans (9-inch) for the red velvet cake layers.
- Electric mixer to achieve a smooth texture for the cheesecake and frosting.
- Mixing bowls for combining wet and dry ingredients separately.
- Offset spatula for evenly spreading the frosting.
Step-by-Step Instructions
1. Make the Cheesecake Layer
- Preheat your oven to 325°F (165°C) and grease a 9-inch springform pan. Line the bottom with parchment paper.
- In a large bowl, beat the softened cream cheese and sugar until smooth.
- Add sour cream and vanilla extract, mixing until combined.
- Add the eggs one at a time, beating on low speed to avoid incorporating too much air.
- Pour the cheesecake batter into the prepared pan and bake for 40–45 minutes, or until the center is set but still slightly jiggly.
- Let the cheesecake cool completely, then refrigerate for at least 4 hours or overnight.
2. Prepare the Red Velvet Cake Layers
- Preheat your oven to 350°F (175°C). Grease and line two 9-inch round cake pans with parchment paper.
- In a medium bowl, whisk together the flour, cocoa powder, baking powder, baking soda, and salt.
- In a large mixing bowl, beat the sugar and vegetable oil until well combined. Add the eggs, one at a time, followed by the vanilla extract, red food coloring, and vinegar.
- Alternate adding the dry ingredients and buttermilk to the wet mixture, beginning and ending with the dry ingredients. Mix until just combined—do not overmix.
- Divide the batter evenly between the prepared pans and bake for 25–30 minutes, or until a toothpick inserted into the center comes out clean.
- Let the cakes cool in the pans for 10 minutes before transferring them to a wire rack to cool completely.
3. Make the Cream Cheese Frosting
- Beat the softened cream cheese and butter together in a large bowl until smooth and creamy.
- Gradually add the powdered sugar, 1 cup at a time, beating well after each addition.
- Add the vanilla extract and mix until fully incorporated.
4. Assemble the Cheesecake
- Place one red velvet cake layer on a serving plate or cake stand. Spread a thin layer of frosting on top.
- Carefully place the chilled cheesecake layer on top of the frosted cake layer. Spread another thin layer of frosting on top of the cheesecake.
- Top with the second red velvet cake layer. Use the remaining frosting to cover the top and sides of the cake, smoothing it with an offset spatula.
5. Decorate and Chill
- Garnish the cake with holiday-themed decorations such as red and green sprinkles, crushed candy canes, or chocolate shavings.
- Chill the assembled cake for at least 1 hour before serving to allow the layers to set.

Tips and Variations
Tips for Success
- Ensure all ingredients are at room temperature for smoother mixing.
- Refrigerate the cheesecake layer overnight for easier assembly.
- Use a serrated knife to trim any uneven edges of the cake layers before assembling for a neat finish.
Variations
- Chocolate Lover’s Twist: Add a layer of chocolate ganache between the red velvet and cheesecake layers.
- Peppermint Red Velvet Cheesecake: Add peppermint extract to the frosting and garnish with crushed candy canes.
- Gluten-Free Option: Use gluten-free all-purpose flour for both the cake and cheesecake layers.
Serving Suggestions
Serve this Christmas Red Velvet Cheesecake as the centerpiece of your holiday dessert table. Place it on a decorative cake stand and surround it with festive accents like pinecones, fairy lights, or holly sprigs.
Pair it with beverages like hot cocoa, spiced chai, or eggnog for a cozy treat. For an after-dinner dessert, a glass of sparkling wine or a robust port enhances the rich, creamy flavors beautifully.
Pairings
This indulgent dessert pairs wonderfully with both warm and chilled beverages:
- Coffee or Espresso: The bitterness balances the sweetness of the cake and cheesecake layers.
- Spiced Hot Chocolate: Complements the cocoa undertones in the red velvet layers.
- Creamy Eggnog: A holiday favorite that mirrors the richness of the dessert.
- Non-Alcoholic Punch: A refreshing cranberry or pomegranate punch provides a fruity contrast.

Storage and Reheating
Short-Term Storage
- Store the assembled cheesecake in the refrigerator, covered, for up to 5 days.
Long-Term Storage
- Freeze individual slices by wrapping them tightly in plastic wrap, then foil, and storing them in an airtight container for up to 2 months. Thaw in the refrigerator overnight before serving.
Nutritional Information
| Nutrient | Per Serving (1 slice) |
|---|---|
| Calories | 470 |
| Fat | 25g |
| Carbohydrates | 56g |
| Protein | 6g |
| Sugars | 41g |
Nutrition information is automatically calculated, so should only be used as an approximation.
Conclusion
Christmas Red Velvet Cheesecake is the ultimate holiday dessert, blending the classic flavors of red velvet cake with the creamy richness of cheesecake. Its vibrant colors and festive appeal make it a standout addition to any celebration, while its luxurious flavor ensures it’s a treat everyone will remember.
Try this recipe for your next holiday gathering and share your photos and variations with loved ones. This stunning dessert is sure to become a holiday tradition that delights year after year.
Christmas Red Velvet Cheesecake Recipe
12
servings45
minutes1
hour15
minutes7
hoursIngredients
- Red Velvet Cake Layers:
2 1/2 cups all-purpose flour
2 tbsp unsweetened cocoa powder
1 tsp baking powder
1 tsp baking soda
1/2 tsp salt
1 3/4 cups granulated sugar
3/4 cup vegetable oil
1 cup buttermilk
2 large eggs
1–2 tbsp red food coloring
1 tsp vanilla extract
1 tsp white vinegar
- Cheesecake Layer:
16 oz cream cheese
1/2 cup granulated sugar
1/2 cup sour cream
2 large eggs
1 tsp vanilla extract
- Cream Cheese Frosting:
8 oz cream cheese
1/2 cup unsalted butter
3 cups powdered sugar
1 tsp vanilla extract
Directions
- Bake the cheesecake layer at 325°F for 40–45 minutes. Chill.
- Prepare red velvet cake layers at 350°F for 25–30 minutes. Cool completely.
- Make cream cheese frosting by beating cream cheese, butter, powdered sugar, and vanilla until smooth.
- Assemble the cake by layering red velvet, cheesecake, and frosting. Cover with frosting.
- Chill for 1 hour before serving.

